If you love Dublin photos but hate fiddling with settings, this helps. PicTours Dublin is a short photo-themed walking tour that mixes city landmarks with hands-on camera and Instagram coaching. You’ll practice how to see light, frame subjects, and turn those shots into posts that actually get noticed.
What I like most is the focus on specific picture skills (especially lighting, color, and contrast) instead of vague “take a photo here” sightseeing. I also like that you get a real Dublin mix: parks, indoor architecture, a street full of buskers, then some surprise photo stops.
One consideration: you’ll be walking between locations, and camera equipment isn’t provided, so bring your phone (or your own camera) and a charged battery.
In This Review
- Key things that make this tour work
- A 90-minute Dublin photo walk built for better results
- Starting point: Fusiliers’ Arch near St Stephen’s Green at 2:00 pm
- Stop 1: St Stephen’s Green for nature and wildlife framing
- Stop 2: St Stephen’s Green Shopping Centre for indoor architecture shots
- Stop 3: Grafton Street street photography, lighting tricks, and hashtags
- Stop 4: Anne Street South and the umbrella art installation
- Stop 5: Two secret Dublin locations for surprise photo ops
- What you actually get: techniques, Instagram coaching, and guide-made photos
- Price and value: how a free tour can still be a smart buy
- Who this tour is best for (and who might want to think twice)
- Should you book PicTours Dublin?
- FAQ
- How long is the PicTours Dublin photography walking tour?
- Where does the tour start?
- What time does the tour start?
- Is the tour offered in English?
- How many stops will we visit?
- Is camera equipment included?
- What is the maximum group size?
- Can I cancel for a full refund?
Key things that make this tour work
- St Stephen’s Green as a beginner-friendly photo warm-up with nature and wildlife framing tips
- An indoor stop focused on architectural details and interior Instagram advice
- Grafton Street street photography coaching tied to real lighting conditions on a busy street
- Anne Street South umbrella installation practice for contrast and color control
- Two secret locations that change daily with weather, art updates, and what your group needs
- Small group size (max 15) so you can actually get feedback
A 90-minute Dublin photo walk built for better results
This is the kind of tour that respects your time. Ninety minutes is long enough to teach a handful of techniques and short enough that you’re not stuck in “tour fatigue.” It’s also practical: you don’t need fancy gear. The experience is clearly aimed at the cameras most people carry—phones—and the coaching style is what makes the difference.
You’ll leave with more than a few pictures that look fine. The goal is more like: you understand why a shot works. That matters in Dublin, where the light can swing quickly and street scenes can get busy fast. If your photos usually come out slightly flat or too dark, this tour is designed to fix that through step-by-step guidance—especially around lighting.
Also, the tour is rated 4.9 with 157 reviews and a recommendation rate of 99%. That doesn’t guarantee your experience, but it does suggest consistent quality and a repeatable format.
You can also read our reviews of more tours and experiences in Dublin.


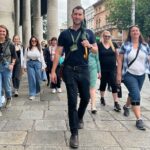
Starting point: Fusiliers’ Arch near St Stephen’s Green at 2:00 pm

Your meeting point is Fusiliers’ Arch in the St Stephen’s Green area (Dublin, D02 HX65). The tour starts at 2:00 pm, and it runs for about 1 hour 30 minutes.
This location is useful because you’re starting right where Dublin opens up into parks and city streets. It’s also near public transportation, which helps if you’re arriving from elsewhere in town.
Do a quick reality check before you go: in this area, the park, nearby shopping spaces, and street entrances can feel like different places. If you arrive early, take a minute to confirm you’re at the right side of the arch and be ready to match your guide’s location on the spot.
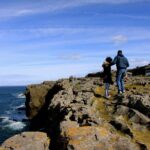
Stop 1: St Stephen’s Green for nature and wildlife framing
At the first stop, you’ll start in St Stephen’s Green, with a focus on mastering the shot for nature and wildlife in the park. It’s a smart opener. Parks are where most people learn the hardest photography lesson without realizing it: patience. You can’t force a bird to move, but you can frame, focus, and compose better while you wait.
You also learn beginner-friendly technique right away, not after you’ve burned half the tour guessing. Since this stop is listed as 15 minutes, you should think of it as a quick workshop plus practice time, not a long nature walk.
Why it’s worth your attention
- The lighting here is often softer than on main streets, which makes it easier to understand exposure and contrast.
- You’ll practice “what am I really photographing?”—not just “where’s the landmark?”
Possible drawback
- If the weather is rough, you may have less time to experiment in the greenery. Dublin days can change fast, so bring a light layer even if it looks fine at 1 pm.
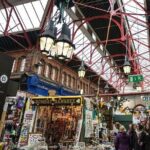
Stop 2: St Stephen’s Green Shopping Centre for indoor architecture shots
Next you head to St. Stephen’s Green Shopping Centre for a change of pace. This is where you learn interior photography skills, and you’ll also get context about the building—known as one of the spots connected to U2’s early gigs and the old trading hall.
Indoor spaces can be tricky because light behaves differently than outdoors. Your guide will show you how to capture interior design and architectural details, plus your first Instagram tip for making those images easier to discover.
What you’ll likely focus on here
- Straightening lines and tightening framing so the architecture looks intentional
- Handling darker interiors without making everything look muddy
- Choosing an Instagram approach that fits the photo (filter choices and presentation)
This stop also breaks up the walking. Even if you’re mostly there for photos, it’s a nice reset: park air, then indoor structure.
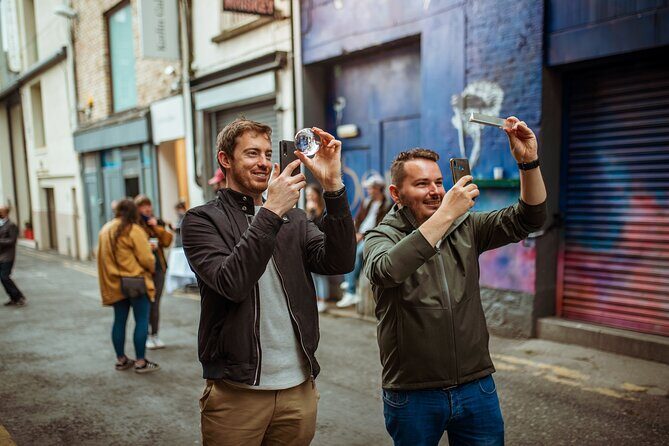
Stop 3: Grafton Street street photography, lighting tricks, and hashtags
Then you’re on Grafton Street, Dublin’s famous, busy shopping street. This is where the tour leans into street photography and learning to maximize lighting on the move.
Grafton Street is also where the soundtrack shows up—buskers tend to be around day and night. That means you’ll get a lively street scene, but it also means light changes quickly between shop fronts, shadows, and open sky.
Your guide shows you how to maximize the shot in that real-world chaos, plus you’ll learn Instagram skills like:
- how to filter your photos
- which hashtags to use so your post has a better chance of getting picked up through discovery
How to get more out of this stop
- Don’t chase every subject. Pick one: a busker moment, a gesture, a storefront rhythm, a doorway.
- If your first photo feels wrong, adjust one thing at a time—framing or angle—before you start changing everything.
One reason this stop gets strong results is that it teaches a repeatable habit: watch the light first, then shoot. Phones can do a lot, but they still need direction.


Stop 4: Anne Street South and the umbrella art installation
At Anne Street South, you’ll step into one of those Dublin side areas where the city looks like it’s been waiting for your camera. The tour highlights a famous umbrella art installation on a back street, and it’s paired with photography coaching focused on contrast and making color pop.
This is a great stop if your Dublin photos usually look gray or washed out. You’ll get practical guidance on using the available light to make the umbrella scene feel bold rather than flat.
You’ll also get an Instagram tip tied to timing—how to post so it reaches more people in the feed flow.
What makes this stop special
- Umbrellas are color-heavy, which forces you to learn how to manage saturation and contrast.
- The scene is visually distinctive, so even simple improvements show up fast in your results.
If you’re traveling with friends or family, this is also the easiest place to get “everyone looks good” photos without overthinking it.
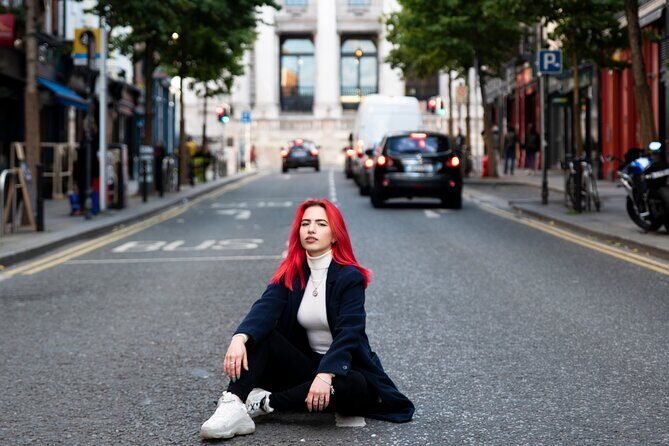
Stop 5: Two secret Dublin locations for surprise photo ops
The last main segment is the fun bit: two secret locations. You only find out what they are by joining the tour, and the locations can change daily based on weather, new installations, and what your group seems most interested in.
The plan is 30 minutes here, which is short but enough time to work a location in two or three different ways:
- one wider establishing shot
- one closer detail shot
- one “light and framing” practice shot
Because the secret stops can vary, the best way to prepare is to be flexible. If you’re hoping for a specific neighborhood or type of photo (portraits, murals, architecture), tell your guide your preferences and see if the daily picks can match that.
Why this matters
Most city photo tours recycle the same few highlights. The secret locations idea means you might get a less obvious angle on Dublin—something you wouldn’t likely hunt down on your own.
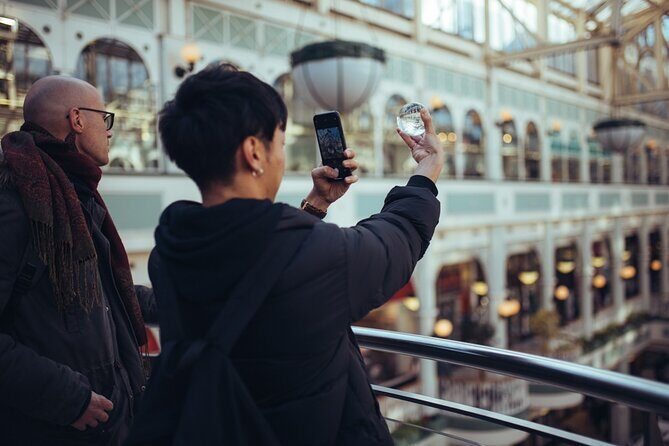
What you actually get: techniques, Instagram coaching, and guide-made photos

The included experience is built around real instruction, not just walking and stopping. You get:
- 5–7 spots across the 90 minutes
- photography techniques (with emphasis on lighting, contrast, framing, and color)
- Instagram coaching
- stories about Dublin as you move between locations
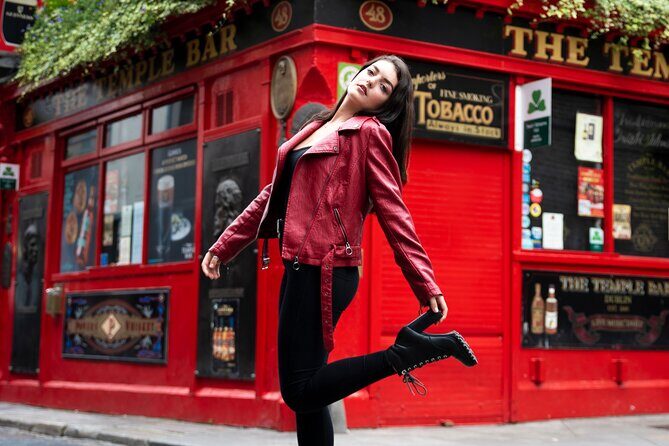
You also have a strong chance of leaving with photos the guide took for you. The highlights promise professional-style images, and one review specifically notes that a collection of photos from the guide arrives after the tour. That’s a big value add if you’re bad at getting your own “someone else took this” shots.
On the Instagram side, the tour doesn’t just talk about posting—it includes specifics like:
- which filters to use
- which hashtags to choose
- posting time suggestions to improve reach
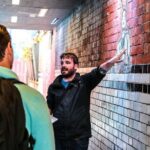
Also, you’re not stuck learning in a vacuum. Some guides are described as patient and encouraging, including one-on-one feedback for a solo participant. If you’re not tech-savvy, that supportive teaching style matters more than the camera itself.
Guides named in the feedback include Anna, Diana, Shauna, Anu/Anupama, and David. The common thread is clear: they teach, they explain in plain language, and they adjust when you’re struggling—especially with iPhone settings and features.
Price and value: how a free tour can still be a smart buy
This listing shows $0.00 per person, which is unusual for a guided, technique-focused experience. Even if the exact price for your date is different in the checkout flow, treat the “free or near-free” positioning as the core value signal: you’re getting instruction and a guided route without the typical premium cost.
So what’s the value here?
- You pay with time, not money: 90 minutes walking plus photo practice.
- You’re buying improvement: learning how to get better shots on your device.
- You’re also buying convenience: you don’t have to plan a photo route or figure out lighting and Instagram choices by trial and error.
Just remember: since camera equipment isn’t included, you’ll still need your own phone/camera. Bring a charger if you can. A dead battery can ruin the best plan.
Who this tour is best for (and who might want to think twice)
This works best for:
- couples and solo travelers who want a structured way to shoot photos in a short window
- people who mostly rely on their phone and want practical iPhone improvements
- anyone who likes Dublin landmarks but wants photos that look intentional, not accidental
It may feel less ideal if:
- you hate walking or have limited mobility (the tour includes multiple stops across the city)
- you expect long stops for deep exploring (each location is about 15 minutes, with 30 minutes for the secret stops)
Should you book PicTours Dublin?
If you want Dublin photos with less stress, I’d book it—especially if your goal is to get better results from your phone. The tight schedule, the repeated focus on lighting, color, and contrast, and the Instagram coaching are exactly what you need when you only have a day or two in the city.
Book it if you’re:
- ready to practice while you walk
- open to learning a few repeatable techniques
- okay with surprise locations at the end
Skip it only if you need long, slow sightseeing stops or you’re traveling without your own camera/phone setup. Otherwise, this is a strong way to turn a normal Dublin day into photos you actually like—and understand.
FAQ
How long is the PicTours Dublin photography walking tour?
It runs for about 1 hour 30 minutes (approx.).
Where does the tour start?
The meeting point is Fusiliers’ Arch, St Stephen’s Green, Dublin, D02 HX65, Ireland.
What time does the tour start?
The start time is 2:00 pm.
Is the tour offered in English?
Yes, it is offered in English.
How many stops will we visit?
You’ll visit 5–7 spots of Dublin city over 90 minutes.
Is camera equipment included?
No. Camera equipment is not included.
What is the maximum group size?
The tour has a maximum of 15 travelers.
Can I cancel for a full refund?
Free cancellation is available, and you must cancel up to 24 hours in advance of the experience start time for a full refund.